Assign a Task to Your Agent
Conversations are great for ad-hoc requests, but when you need structured work with trackable progress, use Tasks. In this tutorial, you'll create a task, assign it to your agent, monitor progress, and handle the feedback loop when the agent needs your input.
Prerequisites
- A running agent (Create Your First Agent)
Steps
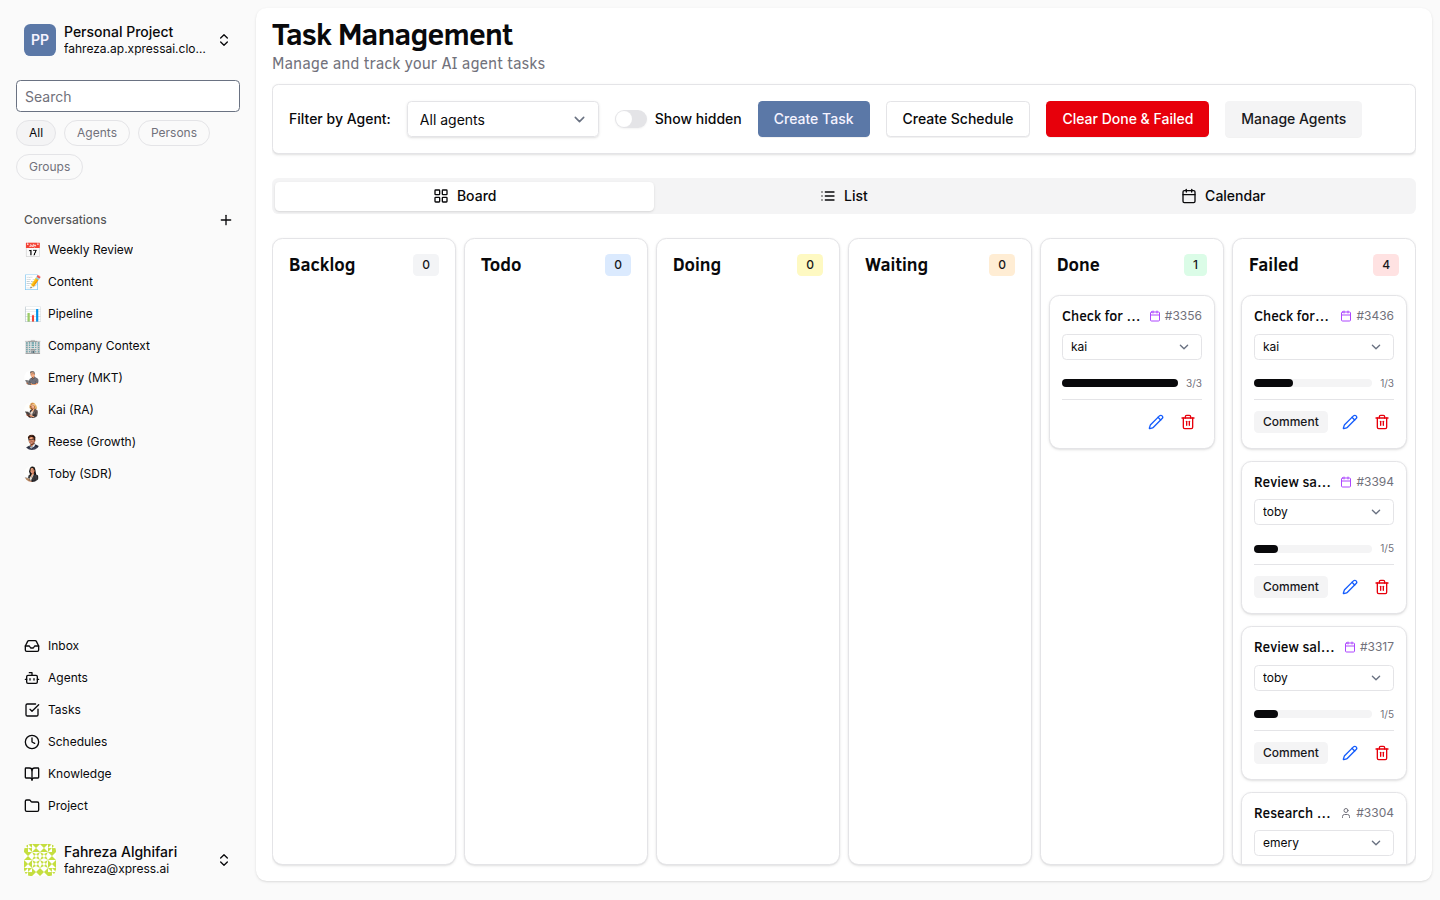
1. Navigate to the Tasks page
In the sidebar, click Tasks. This opens the task management view where you can see all tasks across your project.
2. Create a new task
Click Create Task. You'll see a form with the following fields:
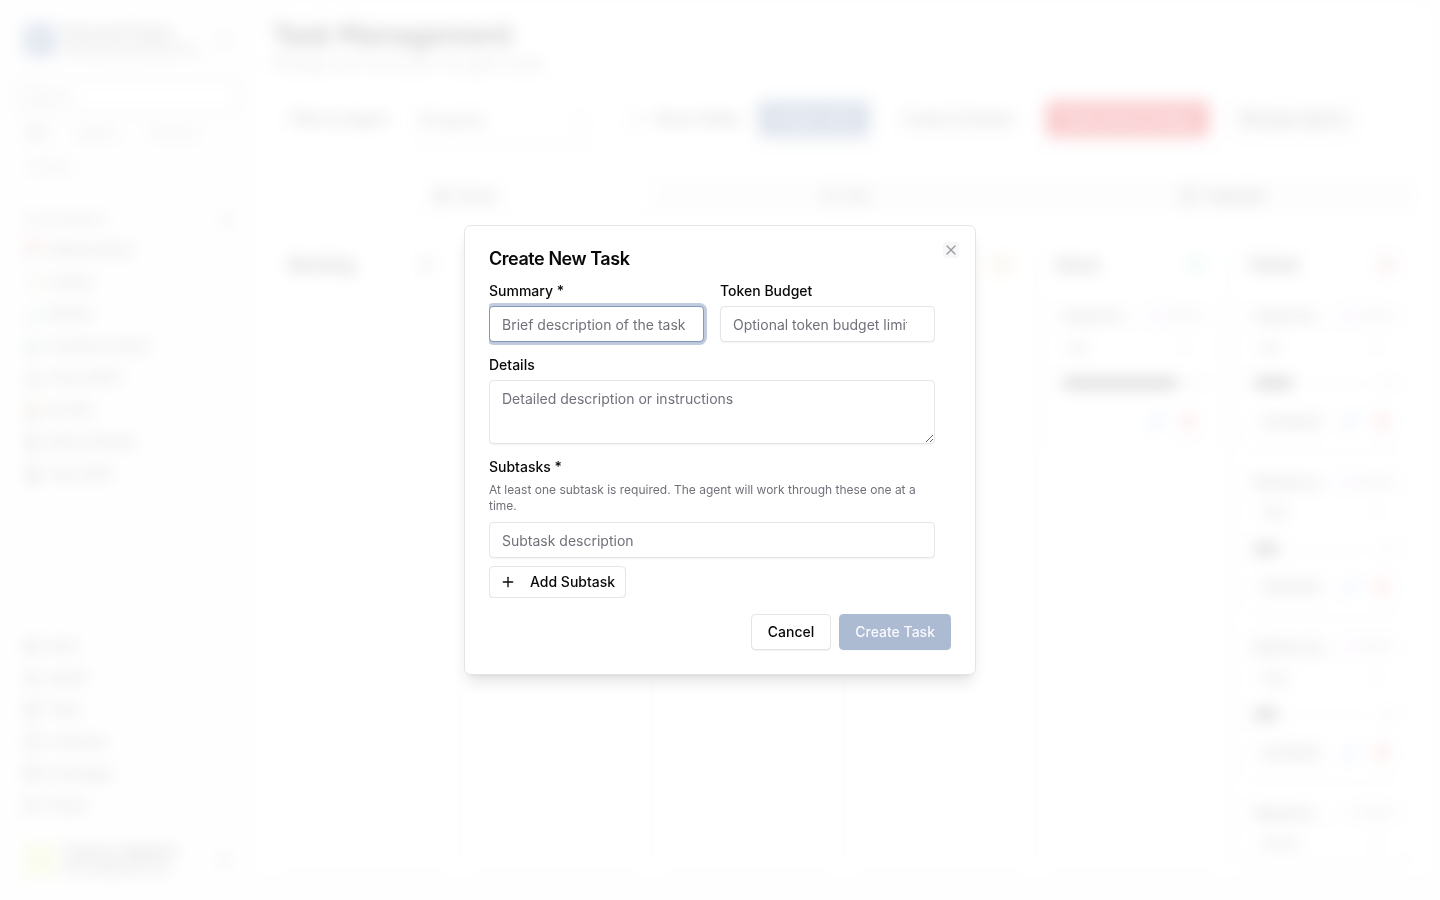
- Summary -- a short title for the task. Make it specific and actionable.
- Details -- optional context, background information, or constraints the agent should know about.
- Steps -- break the task into subtasks. Each step becomes a trackable unit of progress.
3. Fill in the task
Here's an example:
| Field | Value |
|---|---|
| Summary | Research competitor pricing |
| Details | Focus on the top 3 competitors in our market segment. I need current pricing tiers, feature comparisons, and any recent pricing changes from the last 6 months. |
| Steps | 1. Identify the top 3 competitors |
| 2. Gather current pricing for each tier | |
| 3. Compare features across tiers | |
| 4. Note any recent pricing changes | |
| 5. Compile findings into a summary |
4. Assign the task to your agent
Use the agent selector to pick the agent you want to handle this task. Select the Personal Assistant you created earlier (or whichever agent is best suited for the work).
Click Create to submit the task.
5. Understand the task lifecycle
Tasks move through a defined set of statuses:
Backlog → Todo → Doing → Waiting → Done
                              ↘ Failed
- Backlog -- the task is created but not yet picked up.
- Todo -- the task is queued and the agent will start it soon.
- Doing -- the agent is actively working on the task.
- Waiting -- the agent needs your input before it can continue.
- Done -- all steps are completed.
- Failed -- the task could not be completed (you can review what went wrong).
After you create the task, it starts in Backlog. The agent picks it up and moves it to Doing automatically.
6. Watch the progress
As the agent works through the task, you can see:
- Subtask status -- each step shows whether it's pending, in progress, or complete.
- Progress bar -- an overall completion indicator based on how many steps are done.
Refresh the task view periodically, or stay on the page and watch updates come in.
7. Respond when the agent needs input
If the agent encounters something it can't resolve on its own, the task moves to Waiting status. When this happens:
- Check your Inbox (sidebar → Inbox). The task will appear there with the agent's question or request for clarification.
- Read what the agent needs.
- Provide your response in the text input that appears below the agent's question.
- The agent picks up where it left off and moves the task back to Doing.
Keep an eye on your Inbox. It's the central place where agents surface questions and blockers. Responding promptly keeps your agents productive.
8. Review the completed task
When all subtasks are done, the task moves to Done. Open it to review the agent's work, including any outputs, summaries, or artifacts it produced.
9. Explore different views
The Tasks page offers multiple ways to visualize your work:
- Kanban board -- drag-and-drop cards organized by status columns (Backlog, Todo, Doing, Waiting, Done).
- List view -- a flat table of all tasks with sortable columns.
- Calendar view -- tasks plotted on a calendar by due date.
Switch between views using the toggle at the top of the Tasks page.
What you've done
- Created a task with a summary, details, and subtasks
- Assigned the task to your agent
- Tracked progress through the task lifecycle
- Responded to an agent's request for input via the Inbox
- Explored Kanban, list, and calendar views
Next steps
One agent is useful. A whole team is powerful. Head to Deploy a Starter Team to spin up a coordinated group of agents with pre-configured channels.
See also