Authenticate with the API
The XpressAI Platform exposes both a GraphQL API and a REST API. To call either one, you need a platform token. This tutorial walks you through creating a token, making your first GraphQL query, and hitting the Tasks REST endpoint -- all from the command line.
Prerequisites
- A platform account (Getting Started)
curlinstalled on your machine- At least one project (your personal project works fine)
Steps
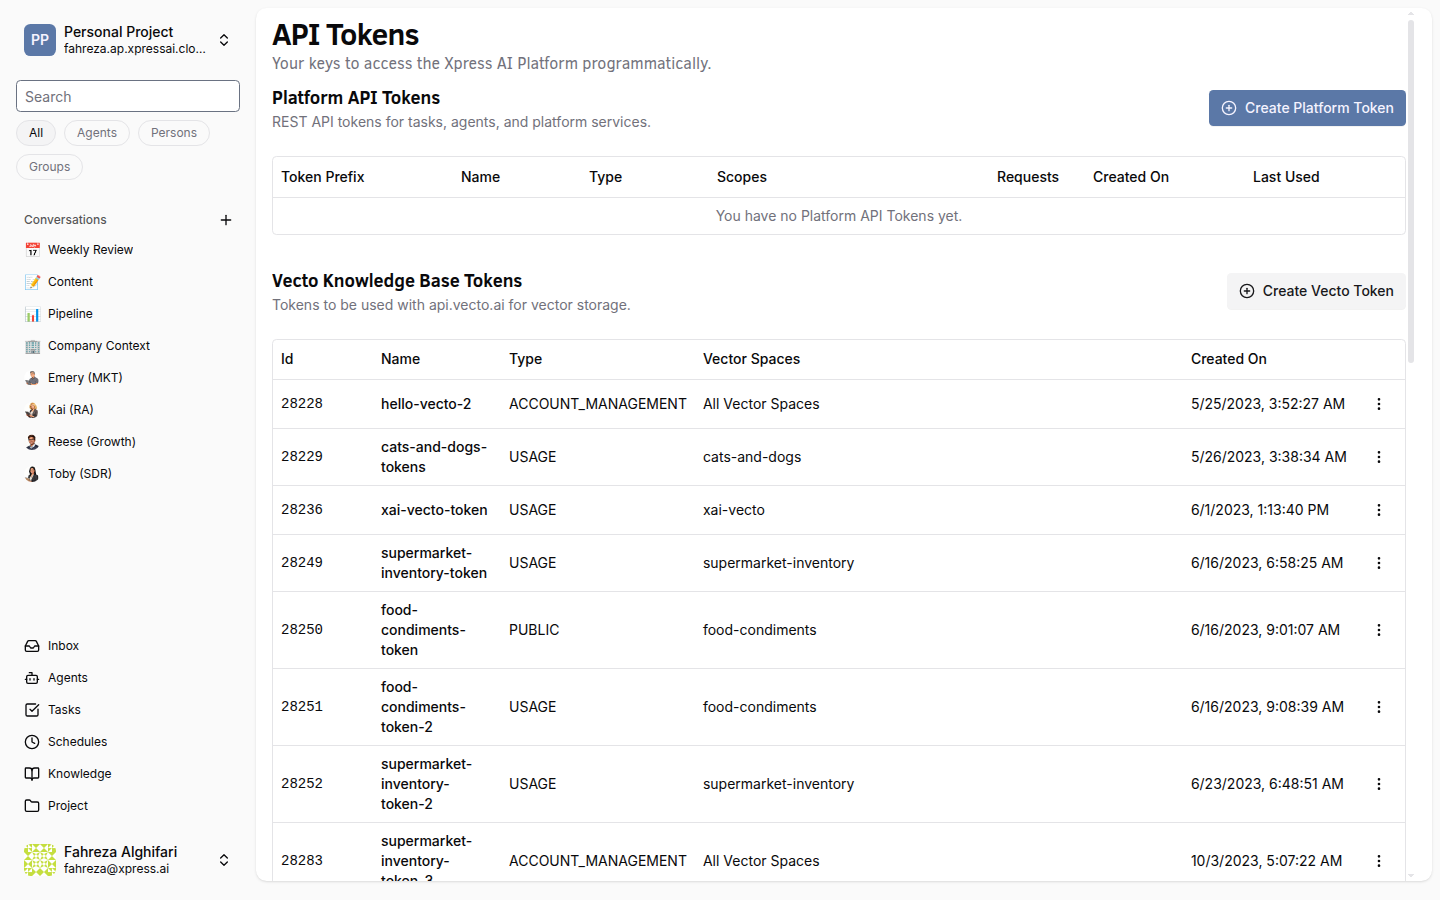
1. Navigate to the Tokens page
In the sidebar, select your project from the project selector, then click Settings. On the Settings page, find the Tokens tab. This is where you manage API credentials for the selected project.
2. Create a new token
Click Create Token. You'll be prompted to:
- Name -- give the token a descriptive label (e.g.,
cli-dev,ci-pipeline,data-sync). Pick something that tells you what the token is used for when you see it in a list six months from now. - Scopes -- select the permissions the token needs. Available scopes include:
| Scope | What it grants |
|---|---|
messaging:read | Read conversations and messages |
messaging:write | Send messages and create conversations |
task:read | List and view tasks |
task:write | Create, update, and delete tasks |
Select only the scopes your use case requires. For this tutorial, enable all four.
3. Copy your token
After creation, the platform displays the token value once. Copy it immediately and store it somewhere safe (a password manager, a .env file, your CI secrets store).
You will not be able to see the token again after closing this dialog. If you lose it, you'll need to create a new one.
4. Make your first GraphQL query
Test the token by querying the list of projects your account has access to:
The API URL shown below (https://platform.ap.xpressai.cloud) is for the default deployment. Your URL may differ depending on your deployment region or environment. Check your platform settings for the correct base URL.
curl -X POST https://platform.ap.xpressai.cloud/graphql \
  -H "Content-Type: application/json" \
  -H "Authorization: Bearer YOUR_TOKEN" \
  -d '{"query": "{ projects { id name } }"}'
You should get back a JSON response with your project IDs and names:
{
  "data": {
    "projects": [
      { "id": "personal-jdoe", "name": "Personal" }
    ]
  }
}
If you get a 401 Unauthorized response, double-check that the token is pasted correctly and that you included the Bearer prefix.
5. Make a REST call to the Tasks API
The platform also exposes REST endpoints for task management. List your tasks with:
curl https://platform.ap.xpressai.cloud/api/tasks \
  -H "Authorization: Bearer YOUR_TOKEN"
This returns a JSON array of tasks in the current project. If you haven't created any tasks yet, you'll get an empty array -- that's fine.
6. Understand token types
The platform has two kinds of tokens:
| Token type | Purpose | Created from |
|---|---|---|
| Platform Token | Authenticate against the GraphQL and REST APIs | Settings > Tokens |
| Data Token | Authenticate against vector space endpoints for knowledge base access | Settings > Tokens (Data tab) |
Platform Tokens are what you'll use for most automation work. Data Tokens are scoped specifically to vector space operations -- uploading documents, running similarity searches, and managing knowledge bases.
7. Follow token best practices
A few ground rules for keeping your tokens safe:
- Rotate regularly. Set a reminder to regenerate tokens every 90 days, or whenever a team member leaves the project.
- Use minimal scopes. A script that only reads tasks should not have
messaging:write. Principle of least privilege applies here just like anywhere else. - Never commit tokens to source control. Use environment variables or a secrets manager. If a token accidentally ends up in a commit, revoke it immediately and create a new one.
- One token per integration. If you have a CI pipeline and a local dev script, create separate tokens for each. This way you can revoke one without breaking the other.
Store your token in an environment variable so you don't have to paste it into every command:
export XPRESSAI_TOKEN="your-token-here"

curl -X POST https://platform.ap.xpressai.cloud/graphql \
  -H "Content-Type: application/json" \
  -H "Authorization: Bearer $XPRESSAI_TOKEN" \
  -d '{"query": "{ projects { id name } }"}'
What you've done
- Created a platform token with messaging and task scopes
- Made a GraphQL query to list your projects
- Made a REST call to the Tasks API
- Learned the difference between Platform Tokens and Data Tokens
- Reviewed token security best practices
Next steps
Now that you can authenticate, head to Create a Custom Agent to build an agent from scratch using XAIBO configuration.
See also