Deploy a Starter Team
Instead of creating agents one by one, you can deploy an entire coordinated team in a single action. Starter teams come with pre-selected agents and pre-configured channels so your team is ready to collaborate immediately.
Prerequisites
- A platform account (Getting Started)
- A subscription plan that supports at least 4 agents (Team tier or above). Each starter team deploys 4 agents.
The free tier only includes 1 agent, and the Pro tier includes 3. Starter teams require 4 agents, so you'll need at least the Team tier. If your current plan does not support enough agents, the platform will prompt you to upgrade before deploying. See Subscription Tiers for details.
Steps
1. Navigate to the Agents page
In the sidebar, click Agents. If you don't have any agents yet, you'll see the Agent Catalog at the top and Starter Teams below it.
2. Browse the starter teams
Five starter teams are available, each designed for a different use case:
| Team | Agents included |
|---|---|
| Sales & Growth | Sales Dev Rep + Growth Marketing + Content Marketing + Research Assistant |
| Engineering | Developer + DevOps Engineer + Project Manager + Research Assistant |
| Customer Operations | Customer Success + Sales Dev Rep + Project Manager + Personal Assistant |
| Solopreneur | Personal Assistant + Content Marketing + Research Assistant + Sales Dev Rep |
| People & Operations | HR Coordinator + Project Manager + Personal Assistant + Content Marketing |
3. Select a team
For this tutorial, pick Sales & Growth. Click the team card to select it.
4. Provide company context
After selecting a team, the platform asks you to provide context about your company. This information helps your agents understand your business, products, and target audience so they can be effective from day one.
You have two options:
- Upload a document -- drop in a company overview, pitch deck, product brief, or any document that describes your business.
- Voice interview -- answer a series of questions verbally. The platform records your responses and uses them to build context.
Either way, the platform distributes this context to all agents in the team via their shared knowledge directory.
The more context you provide, the better your agents perform. A one-page company overview covering your product, target market, and competitive positioning goes a long way.
5. Deploy the team
Click Deploy. The platform provisions all 4 agents simultaneously:
- Sets up the environment and copies template configuration for each agent.
- Starts all agent services.
- Creates pre-configured conversation channels and adds the appropriate agents to each one.
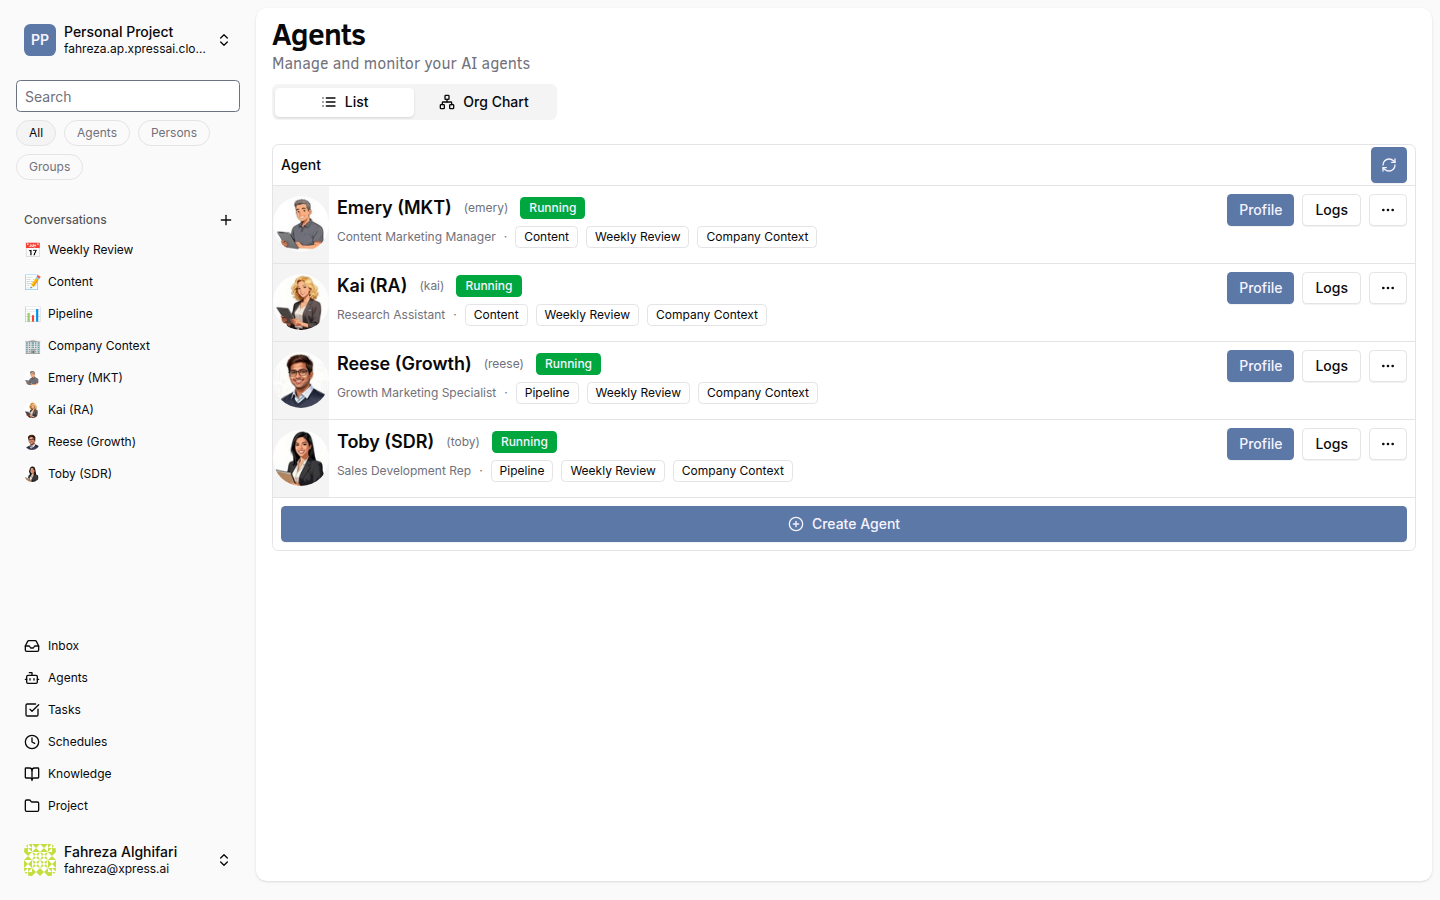
6. Explore the auto-created channels
Each starter team comes with channels tailored to its workflow. For example, the Sales & Growth team creates channels such as:
- Pipeline -- for discussing leads, outreach status, and deal progress.
- Content -- for coordinating blog posts, social media, and marketing materials.
- Weekly Review -- for team-wide status updates and planning.
The channel names listed above are examples for the Sales & Growth team. Other starter teams will have different channels suited to their workflow. Check the Conversations sidebar after deployment to see the exact channels created for your team.
The agents are already added as participants in these channels. You'll find them in your Conversations sidebar.
7. Start collaborating
Open one of the auto-created channels and send a message. For example, in the Pipeline channel:
Let's identify 10 potential leads in the fintech space. @ResearchAssistant can you find companies that recently raised Series A or B funding?
The Research Assistant will start working, and the Sales Dev Rep can jump in with outreach suggestions once research is complete.
8. Review the deployment
Here's a visual summary of what just happened:
What you've done
- Selected a starter team based on your use case
- Provided company context to help agents understand your business
- Deployed 4 coordinated agents in a single action
- Explored pre-configured channels with agents already added
- Sent your first message in a multi-agent channel
Next steps
Your team is up and running. To automate recurring work, head to Schedule a Recurring Job and set up a cron-based schedule.